One ingredient. One bowl. Ten minutes. That is all it takes to make homemade butter that tastes better than anything sitting in your grocery store fridge.
The process is simpler than most people realize — and the result is pure, creamy, real butter with zero additives, zero preservatives, and a flavor that store-bought simply cannot match.
This guide covers everything: the food science behind butter-making, three different methods, cultured butter, compound butter ideas, and what to do with the leftover buttermilk. Sources: KitchenAid, food52, Serious Eats, AllRecipes, and Justine Doiron (justinesnacks.com).
Why Make Butter at Home? (It’s Worth It)
With butter so easy to grab at any store, the natural question is: why make butter at home? The answer is more satisfying than you might expect.
When you make homemade butter, you control everything. The salt level, the freshness, the fat content, the texture. No gums, no fillers, no mystery ingredients. Just heavy cream transformed into something rich and golden right in your kitchen.
For more info: How to Clear Cache on iPhone – Quick and Easy Cleanup Guide
Which Butter Is 100% Real Butter?
Here is the truth: homemade butter made from heavy cream is the purest butter you can eat. It contains only butterfat and water — nothing else. Many commercial butter brands contain additives, colorants, or are made from lower-quality cream.
When you make it yourself, you know exactly what is in it. That is as 100% real butter as it gets.
Is It Actually Cheaper to Make Your Own Butter?
Honestly, it depends on the cream price. At standard US grocery prices, 2 cups of heavy whipping cream costs roughly $3.50–$5.00 and yields approximately 1 cup of butter (16 tablespoons) plus 1 cup of free buttermilk.
A comparable stick of quality unsalted butter costs around $1.50–$2.50 per half-cup. So the butter itself may cost similar or slightly more. But the leftover buttermilk — worth $2–$3 on its own — tips the value equation firmly in your favor. And the flavor gap? Completely incomparable.
Bottom Line: Making butter from heavy cream is not dramatically cheaper than buying it. But you get superior freshness, zero additives, and free buttermilk. That combination makes it worth every minute.
The Science Behind Homemade Butter – Why Cream Becomes Butter
Understanding the science makes you a better butter-maker. And it is genuinely fascinating.
What Cream Actually Is?
Cream is derived from whole milk. When fresh milk sits undisturbed, fat molecules float to the surface, forming a rich layer we skim off and call cream. Heavy whipping cream contains 36% or more butterfat — that fat content is what makes butter possible.
The Three Stages of Butter-Making
When you whip cream, it passes through three distinct stages:
| Stage | What You See | What’s Happening |
| Stage 1 — Soft Peaks | Cream thickens, holds light peaks | Air is being incorporated into fat molecules |
| Stage 2 — Whipped Cream | Stiff, fluffy peaks form | Yellow clumps separate from the white liquid |
| Stage 3 — Butter + Buttermilk | Yellow clumps separate from white liquid | Fat molecules have bonded together, expelling liquid buttermilk |
The key is not stopping at Stage 2. Most people have made whipped cream and stopped there. To get butter, you push through — keep whipping past the fluffy stage until the mixture suddenly breaks and separates. It happens fast. One moment it looks over-whipped, and seconds later, you have golden butter clumps floating in milky liquid.
Why Room Temperature Cream Works Better
Cold cream takes significantly longer to separate and sometimes does not break cleanly at all. Let your cream sit out for 20–30 minutes before starting. Room temperature fat molecules move more freely — they clump together faster and produce a cleaner butter yield.
Why Ultra-Pasteurized Cream Struggles?
If your cream is labeled UHT or ultra-pasteurized, it may not separate properly. The high-heat pasteurization process alters the protein structure of the cream, sometimes preventing clean butter formation and leaving a slightly cooked aftertaste. Look for regular pasteurized heavy whipping cream with a simple ingredient list — just cream, nothing else.
How to Make Homemade Butter – Step-by-Step Recipe
How is butter made step by step?
Here is the complete process — three methods, one delicious result.
Ingredients
- 2 cups heavy whipping cream (room temperature — 36%+ fat content)
- Salt to taste — ½ teaspoon flaky sea salt recommended for salted butter
Method One — KitchenAid Stand Mixer (Fastest)
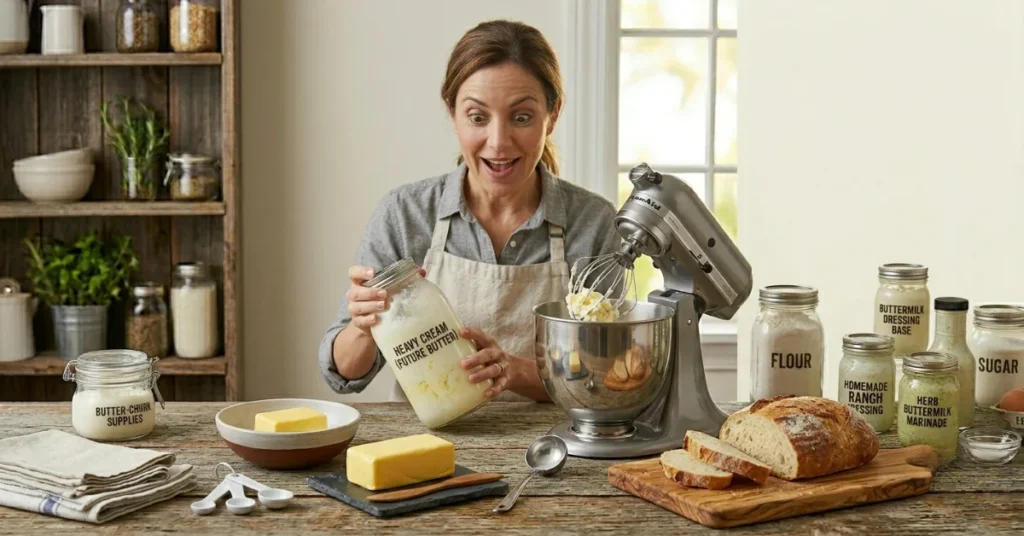
This is the method recommended by KitchenAid Australia and Justine Doiron. Fastest and most hands-off.
- Fit your KitchenAid Stand Mixer with the Whisk Attachment. Attach the Pouring Shield — things will splatter when the cream breaks
- Add room temperature cream. Start on Speed 1, gradually increase to Speed 10
- Whip for 8–10 minutes — you will pass through whipped cream and then suddenly see the cream break into yellow butter clumps and white liquid
- Turn off the mixer. Strain buttermilk through a wire mesh strainer into a separate bowl — save it
- Return butter to the bowl. Pour cold water over it. Knead with hands or a spatula. Strain and repeat until the water runs completely clear — this is critical for shelf life
- Squeeze out all remaining liquid. Add salt to taste. Shape and store
Pro Tip: Keep a kitchen towel over the mixer during Steps 2–4. When the cream breaks, it will splatter. The KitchenAid Pouring Shield helps significantly, but a towel adds extra insurance.
Method Two — Food Processor (3–5 Minutes)
Faster than the stand mixer. Great if you want homemade butter quickly
- Add cream to the food processor. Process on high.
- In 3–5 minutes — much faster than a mixer — the cream will separate into butter and buttermilk
- Drain, rinse with cold water until clear, knead, salt, and store
Method Three — Mason Jar (No Equipment Needed)
This is the method Serious Eats and food52 both highlight for its simplicity. No electricity, no stand mixer, no food processor needed.
- Pour ½ cup of room temperature heavy cream into a clean mason jar — do not overfill
- Seal tightly. Shake vigorously for 15–20 minutes — pass it around if your arms get tired
- The cream will thicken into whipped cream, then break into butter and buttermilk
- Drain, rinse with cold water, knead, and salt
Fun Note: The mason jar method is wonderful with kids. They can shake it, watch the transformation happen, and eat the butter on toast minutes later. AllRecipes lists this as a popular teaching activity for young home cooks.
Storage Guide
| Storage Method | Duration | Tips |
| Refrigerator | 10–14 days | Wrap tightly in parchment, then plastic wrap. Freeze in portion-sized rolls for easy thawing. |
| Freezer | Up to 6 months | Only safe if the kitchen stays below 25°C. Use a butter bell with water changed every 2 days. Not recommended for warm US summers. |
| Room temperature | 1–2 days max | Salt lasts longer |
| Salted vs. unsalted | Salted lasts longer | Salt is a natural preservative — it slows bacterial growth. Food scientist Dr Vincent Candrawinata confirms salted butter stays fresh longer. |
Cultured Butter and Compound Butter – Level Up Your Homemade Butter
Once you have mastered the basic recipe, two upgrades will change the way you think about butter forever.
What Is Cultured Butter?
Cultured butter is tangier, richer, and more complex than standard butter. It is the European-style butter that shows up at fine dining restaurants — and you can make it at home with one extra step.
How to make cultured butter?
Stir one tablespoon of plain yogurt into 2 cups of heavy cream before churning. Cover and leave at room temperature for 12–24 hours. The yogurt introduces live cultures that slightly ferment the cream, developing complex lactic acid flavors. Then churn as normal — the result is noticeably richer and tangier than standard homemade butter.
This technique — referenced by Serious Eats and food52 — gives you a genuinely restaurant-quality butter using ingredients already in your kitchen.
Compound Butter — Four Flavor Categories
Compound butter is simply homemade butter mixed with flavor additions after churning. Shape into a log, wrap in parchment paper, refrigerate or freeze, and slice off rounds as needed.
| Category | Flavor Combination | Best Used For |
| Everyday | Flaky sea salt | Toast, warm bread, simple vegetables |
| Cooking | Roasted garlic + fresh thyme + cracked black pepper | Steak, pasta, roasted potatoes |
| Breakfast | Honey + cinnamon + orange zest | Pancakes, waffles, English muffins, scones |
| Spicy | Chili flakes + smoked paprika + touch of hot sauce | Grilled corn, chicken, shrimp |
Per KitchenAid Australia’s blog, compound butter rolls wrapped in parchment paper can be frozen for up to 6 months. Slice off exactly what you need — it is one of the most practical kitchen prep habits you can build.
What to Do With Leftover Buttermilk – Never Waste a Drop
Every batch of homemade butter produces roughly equal parts butter and buttermilk. That buttermilk is a genuine culinary asset — not a byproduct to pour down the drain.
Six Ways to Use Your Fresh Buttermilk
- Fluffier pancakes and scones: Buttermilk reacts with baking soda to create extra lift and a tender, slightly tangy crumb. Swap it in for any recipe using regular milk — the difference is immediately noticeable
- Better bread and muffins: The acidity of buttermilk tenderizes gluten, creating a softer crumb and better rise. food52 specifically recommends buttermilk as a secret weapon in quick breads
- Buttermilk chicken marinade: Soak chicken pieces in buttermilk for 4–24 hours before frying or baking. The lactic acid tenderizes the meat fibers, producing noticeably juicier, more tender results
- Creamy salad dressing: Whisk buttermilk with mayonnaise, a crushed garlic clove, fresh lemon juice, and chopped herbs for an instant ranch-style dressing that uses no artificial additives
- Mashed potatoes and soups: A splash of buttermilk added at the end of mashing creates a creamy, tangy depth without the heaviness of heavy cream
- Freeze for later: Pour leftover buttermilk into an ice cube tray, freeze solid, then transfer to a zip-lock bag. One cube = approximately 2 tablespoons — ready whenever a recipe calls for it
Smart Kitchen Rule: Never discard fresh buttermilk from a homemade butter session. From a 2-cup cream batch, you get roughly 1 cup of buttermilk — worth $2–$3 at US grocery prices. Factor that into your homemade butter cost calculation and the economics shift entirely in your favor.
Frequently Asked Questions
Can you make butter from milk?
Technically yes — but it is extremely inefficient. Whole milk contains only 3–4% fat, compared to 36%+ in heavy whipping cream. To make butter from milk, you would need to let it sit undisturbed until the cream rises to the top, then skim it off and churn that cream. In practice, you would need several liters of whole milk to yield enough cream for one batch of butter. Heavy cream is the correct and practical starting ingredient for homemade butter — not milk directly.
How is butter made step by step?
To make homemade butter: (1) Pour room temperature heavy whipping cream into a stand mixer, food processor, or mason jar. (2) Whip or shake until the cream passes through the whipped cream stage and separates into yellow butter clumps and white buttermilk. (3) Drain the buttermilk through a strainer — save it. (4) Rinse the butter with cold water, kneading until the water runs clear. (5) Add salt if desired. (6) Shape and refrigerate. Total time: 10–20 minutes depending on method.
Is it actually cheaper to make your own butter?
At standard US prices, making homemade butter costs roughly the same as buying quality store-bought butter per tablespoon — sometimes slightly more depending on cream prices. However, the free buttermilk byproduct (worth $2–$3 per batch) significantly changes the value equation. Factor in superior freshness, zero additives, and the ability to make cultured or compound butter at home, and the answer shifts to yes — especially if you buy cream in bulk or find it discounted.
How much butter do you get from 1 litre of cream?
From 1 litre of heavy whipping cream, you can expect to produce approximately 400–500 grams of butter plus roughly 500ml of buttermilk. The exact yield depends on the fat content of the cream — higher fat cream produces more butter. Per KitchenAid Australia’s testing, 2 cups (approximately 475ml) of cream consistently yields around 16 tablespoons (1 cup) of butter, confirming the roughly 50% cream-to-butter conversion rate.
Which butter is 100% real butter?
By legal definition in the US, any product labeled “butter” must contain at least 80% milkfat. However, commercial butters can contain added colorants, flavorings, and preservatives within legal limits. Homemade butter made from pure heavy cream is the most genuinely pure form — containing only butterfat, water, and trace milk proteins with nothing added. Among commercial brands, look for those with a single ingredient: cream or cream and salt — no other additions. European-style cultured butters from brands like Kerrygold or Plugra are also considered high-quality real butter options.
Final Thoughts
Making homemade butter is one of the most rewarding things you can do in the kitchen — and it takes less time than most people think.
One ingredient. Three methods. Endless variations. Use your KitchenAid Stand Mixer for the fastest result, a food processor for speed, or a mason jar for the pure joy of watching it happen by hand. Try the cultured butter technique once and you will never go back to plain. And please — save every drop of that buttermilk
Heavy cream in. Real butter out. That is the whole recipe.