Dry chicken is one of the most common kitchen mistakes in America. The fix isn’t a secret recipe. It’s knowing exactly how long to cook chicken — and pulling it at the right moment.
Whether you’re using the oven, a stovetop pan, or an air fryer, this guide gives you precise times, temperatures, and the pro techniques that turn average chicken into something genuinely great.
| 165°F USDA safe internal temp for all chicken | 30 min Fastest oven cook time (boneless breast at 425°F) |
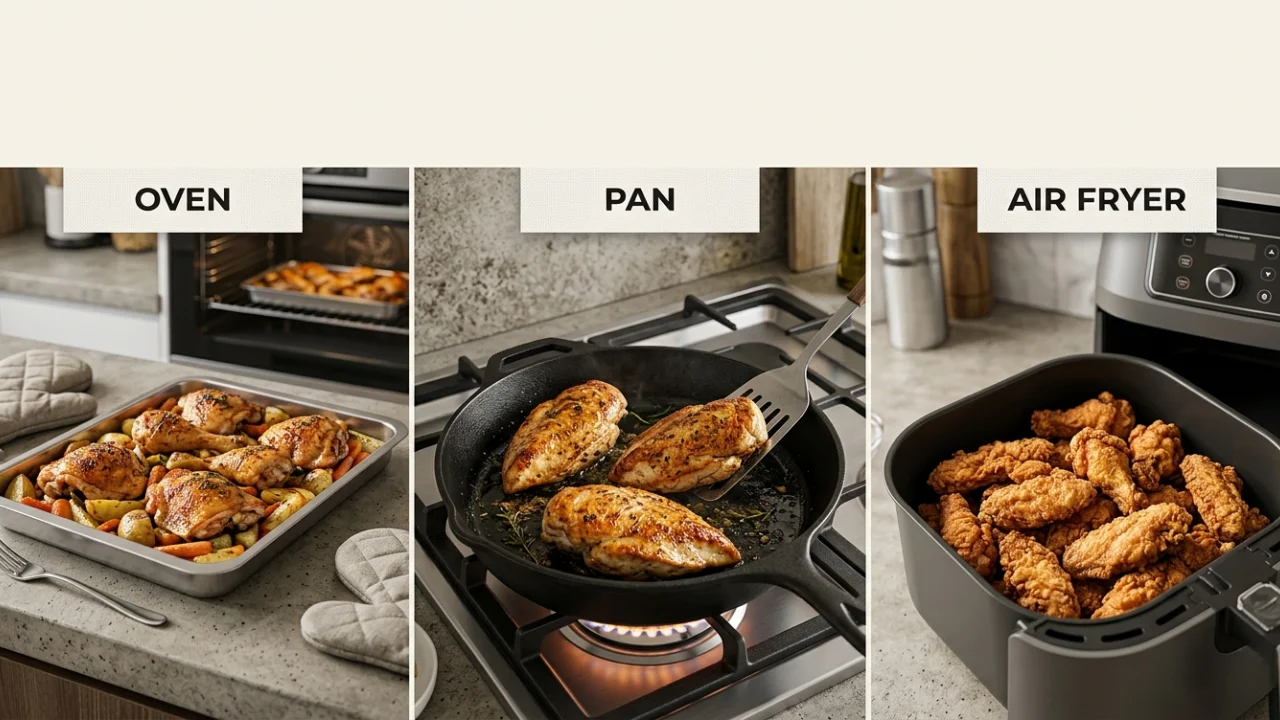
How Long to Cook Chicken — Quick Answer by Method
Different cooking methods produce different results. The method you choose affects not just cook time but flavor, texture, and moisture.
How Long to Cook Chicken in the Oven
Baking is the most forgiving method for beginners. It gives you control and consistency.
According to Gimme Some Oven and Sanderson Farms cooking charts, the most reliable oven temp for boneless chicken breast is 400°F–425°F. Here are the standard times:
| Oven Temp | Boneless Breast | Bone-In Breast | Thighs (Boneless) | Thighs (Bone-In) |
| 375°F | 25–30 min | 40–45 min | 20–25 min | 35–40 min |
| 400°F | 22–26 min | 38–42 min | 18–22 min | 32–38 min |
| 425°F | 18–22 min | 35–40 min | 16–20 min | 28–34 min |
| Pro Tip Always preheat your oven fully before the chicken goes in. A cold oven adds uneven cook time and leads to dry edges with an undercooked center. |
For more info: How Long Does It Take to Fall Asleep? Signs of Good vs Poor Sleep
How Long to Cook Chicken in a Pan on the Stove
Pan-cooking chicken is faster than the oven and builds serious flavor through the Maillard reaction — the golden-brown crust that develops when protein meets high, dry heat.
As documented by Jessica Gavin and confirmed by Reddit’s r/cookingforbeginners community, stovetop chicken follows these general times:
| Cut | Heat Level | First Side | Second Side | Total Time |
| Boneless breast (pounded) | Medium-high | 5–7 min | 4–6 min | 10–14 min |
| Boneless thighs | Medium-high | 5–6 min | 4–5 min | 9–12 min |
| Chicken tenders | Medium | 3–4 min | 2–3 min | 6–8 min |
| Bone-in thighs | Medium | 7–8 min | 6–8 min | 14–18 min |
How Long to Cook Chicken in an Air Fryer
The air fryer has become the go-to method for fast, crispy chicken with less oil. It circulates hot air at high speed, essentially functioning as a compact convection oven.
Air fryer chicken cooks roughly 25–30% faster than a standard oven. Here are the reliable cook times:
| Cut | Air Fryer Temp | Cook Time | Flip Needed? |
| Boneless breast | 375°F | 18–22 min | Yes, at halfway |
| Bone-in breast | 370°F | 25–30 min | Yes, at halfway |
| Boneless thighs | 380°F | 16–20 min | Yes, at halfway |
| Drumsticks | 380°F | 20–25 min | Yes, at halfway |
| Wings | 400°F | 18–22 min | Yes, at halfway |
Chicken Cooking Times by Cut — Complete Breakdown
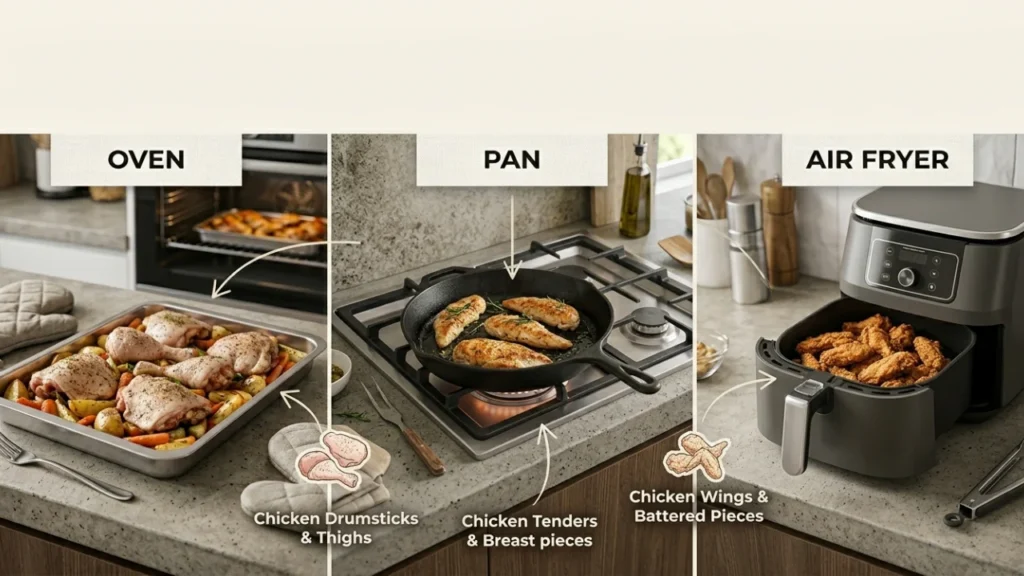
Not all chicken cooks the same. The cut determines everything — cook time, moisture retention, and the best method to use.
How Long to Cook Boneless Skinless Chicken Breast
Chicken breast is the leanest cut. That’s also why it dries out fastest.
It has very little intramuscular fat to protect it from heat. This means even a few extra minutes can push it from juicy to chalky.
Recommended cook times for boneless skinless chicken breast:
- Oven at 400°F: 22–26 minutes
- Stovetop (pounded to ¾ inch): 10–14 minutes total
- Air fryer at 375°F: 18–22 minutes
- Poaching (per Simply Recipes): 15–18 minutes in simmering liquid
How Long to Cook Chicken Thighs, Drumsticks & Wings
Dark meat is more forgiving. Chicken thighs contain more fat and connective tissue, which means they stay moist even if slightly overcooked.
According to Chicken.ca and Sanderson Farms cooking charts, here are the reliable times by cut:
- Boneless thighs (oven 400°F): 18–22 minutes
- Bone-in thighs (oven 400°F): 32–38 minutes
- Drumsticks (oven 400°F): 35–45 minutes
- Wings (oven 425°F): 40–45 minutes for crispy skin
- Wings (air fryer 400°F): 18–22 minutes — crispiest result
Bone-In vs Boneless — The Time Difference Explained
Bone-in chicken always takes longer. The bone acts as an insulator, slowing heat penetration to the center of the meat.
As a rule, bone-in cuts take 30–40% longer than their boneless equivalent at the same temperature.
The bone also conducts heat from the inside during resting — which is why carryover cooking is especially important with bone-in cuts. More on that below.
| Quick Reference Boneless breast at 400°F = 22–26 min. Bone-in breast at 400°F = 38–42 min. Same oven, same temp — nearly 20 minutes difference. The bone changes everything. |
The Right Internal Temperature for Perfectly Cooked Chicken
Time is a guide. Temperature is the truth. The only reliable way to know chicken is done is to check its internal temperature.
Why 165°F Is the USDA Safe Minimum
The USDA sets 165°F (74°C) as the minimum safe internal temperature for all poultry. At this point, harmful bacteria including Salmonella and Campylobacter are completely destroyed.
This isn’t a suggestion — it’s a food safety standard. Chicken that looks cooked on the outside can still harbor dangerous bacteria at its thickest point.
Always insert your instant-read thermometer into the thickest part of the meat, away from bone. Bone conducts heat and gives a falsely high reading.
The Carryover Cooking Secret — Pull at 160°F, Rest to 165°F
When you pull chicken from heat, the temperature inside continues to rise. This is called carryover cooking and it’s driven by residual heat stored in the outer layers.
For chicken breast, carryover raises the internal temp by roughly 3–5°F during resting. That means:
- Pull chicken from the oven or pan at 160°F
- Tent loosely with foil and rest for 5 minutes
- The internal temp will coast up to a safe, juicy 165°F
Waiting until your thermometer reads 165°F before removing it means the meat will actually reach 168–170°F by the time you eat it. That’s the dry, tough chicken everyone complains about.
How to Use an Instant-Read Thermometer the Right Way
Not all thermometer reads are equal. Technique matters.
- Insert at the thickest point — usually the center of the breast or the deepest part of the thigh
- Avoid touching bone — bone heats faster and gives a false high reading
- Insert horizontally for thin cuts like chicken tenders or pounded breasts
- Wait for the reading to stabilize — usually 2–3 seconds for digital thermometers
- For bone-in thighs, check near the joint — that’s the last part to reach safe temp
| Recommended Tool A Thermapen or similar instant-read thermometer gives an accurate reading in under 3 seconds. It’s the single most useful kitchen tool for cooking chicken correctly — more useful than any timer. |
Why Your Chicken Is Dry — And How to Fix It
The Cold Chicken Mistake Most Home Cooks Make
Pulling chicken straight from the refrigerator and cooking it immediately is one of the most common causes of uneven cooking.
Cold chicken has a significant temperature difference between its surface and center. The outside reaches cooking temperature and starts browning — even overcooking — while the center is still catching up.
The fix: let chicken rest at room temperature for 15–30 minutes before cooking. This narrows the temperature gap and promotes even heat penetration.
Note: Don’t leave raw chicken out for more than 30 minutes — that stays within food safety guidelines.
Why Pounding Chicken to Even Thickness Is Non-Negotiable
A standard chicken breast is not uniform. It’s thick in the middle and thin at the edges — sometimes by as much as 1 inch of difference.
This means the thin end overcooks and dries out before the thick center reaches safe temperature. You end up with rubbery edges and a pale, undercooked center.
The solution is simple: place the breast between plastic wrap and pound it to a uniform ¾-inch thickness using a meat mallet or rolling pin. This one step alone reduces cook time and guarantees even doneness across the entire piece.
Brining, Resting & the Science of Juicy Chicken
Moisture loss during cooking is inevitable — but it can be dramatically reduced.
Brining — soaking chicken in a saltwater solution before cooking — works through osmosis. Salt draws moisture into the muscle fibers and restructures the proteins so they hold water better during cooking. Even a 15-minute quick brine in salted water makes a measurable difference.
After cooking, resting chicken for 5 minutes before cutting allows the muscle fibers to reabsorb juices that migrated toward the surface during cooking. Cut too soon and those juices run straight onto your cutting board.
| Science Note During cooking, chicken proteins contract and push moisture outward. Resting gives those proteins time to relax and reabsorb up to 30% more juice than chicken cut immediately off the heat. This is the difference between a dry breast and a genuinely juicy one. |
Pro Tips for Perfect Chicken Every Single Time

The Maillard Reaction — Why High Heat Matters for Flavor
That deep golden-brown color on a well-cooked chicken breast isn’t just visual. It’s flavor — and it’s the result of the Maillard reaction.
When chicken surface proteins hit temperatures above 300°F, they undergo a complex chemical transformation that produces hundreds of new flavor compounds. This is the difference between flavorless pale chicken and something genuinely delicious.
To trigger the Maillard reaction properly:
- Pat chicken completely dry before cooking — surface moisture steams instead of browns
- Use high enough heat — at least medium-high on the stovetop, 400°F+ in the oven
- Don’t crowd the pan or baking sheet — steam kills the crust
- For air fryer: lightly coat with oil — fat accelerates browning
Best Seasonings, Marinades & Oils by Cooking Method
Seasoning and fat choice changes by method. Here’s what works best:
- Oven baking: Olive oil, garlic powder, smoked paprika, onion powder, Italian seasoning. Oil helps the crust form and keeps the surface moist.
- Stovetop searing: Avocado oil or clarified butter — both have high smoke points. Season generously right before cooking.
- Air fryer: Light avocado oil spray + dry rub. Wet marinades can drip and smoke.
- Poaching (per Simply Recipes): Season the liquid, not just the chicken. Bay leaf, garlic, peppercorns, and herbs in the water deeply flavor the meat from within.
How to Store & Reheat Cooked Chicken Without Drying It Out
Cooked chicken lasts 3–4 days in the refrigerator and up to 4 months in the freezer according to USDA food safety guidelines.
Reheating is where most chicken goes wrong. Microwaving on high blasts moisture out of the fibers rapidly.
Better reheating methods:
- Oven method: 300°F with a splash of chicken broth in the dish, covered with foil — 10–15 minutes
- Stovetop: Low heat in a covered skillet with a small amount of water or broth
- Air fryer: 350°F for 4–6 minutes — restores crispiness on skin-on pieces
- Microwave: If you must — use 50% power, cover with a damp paper towel, heat in 45-second intervals
| Food Safety Reminder Never reheat chicken more than once. Each reheat cycle increases bacterial risk. Portion and store chicken in individual serving sizes so you only reheat what you need. |
FAQs — Chicken Cooking Questions Answered
Can a diabetic eat baked chicken?
Yes — baked chicken is one of the best protein choices for people managing diabetes. It’s high in lean protein, low in carbohydrates, and has minimal impact on blood glucose levels. The key is preparation: avoid breaded or fried versions, sugary marinades, or sweet sauces. Baked boneless skinless chicken breast seasoned with herbs, garlic, and olive oil is ideal. According to Healthline, lean protein helps stabilize blood sugar by slowing glucose absorption. People with diabetes can safely make baked chicken a regular part of a balanced plate.
How long does it take chicken to cook in a pan?
A boneless skinless chicken breast pounded to ¾-inch thickness takes 10–14 minutes total on the stovetop over medium-high heat — roughly 5–7 minutes per side. Boneless thighs take 9–12 minutes. Bone-in pieces take 14–20 minutes and may need to be finished in the oven to safely reach 165°F at the center. Always verify with an instant-read thermometer before serving.
Is rotisserie chicken good for high blood pressure?
Store-bought rotisserie chicken can be problematic for people managing high blood pressure due to its extremely high sodium content — some whole rotisserie chickens contain 400–600mg of sodium per serving, and the skin adds saturated fat. That said, removing the skin and rinsing or choosing lower-sodium options significantly reduces this risk. Home-roasted chicken with minimal salt is a much better choice. The American Heart Association recommends keeping daily sodium under 1,500mg for those with hypertension.
Does chicken cook in 30 minutes?
Yes — boneless chicken breast and boneless thighs can absolutely cook in 30 minutes or less depending on the method. At 425°F in the oven, a pounded boneless breast is done in 18–22 minutes. In an air fryer at 375°F, 20–22 minutes is sufficient. On the stovetop, 10–14 minutes. Bone-in cuts and whole pieces take longer. The key is always confirming with a thermometer — time alone is not a guarantee of doneness.
What is the 2-hour rule for chicken?
The 2-hour rule is a USDA food safety guideline: raw or cooked chicken should never sit at room temperature for more than 2 hours. At room temperature, bacteria like Salmonella can double in number every 20 minutes. If the ambient temperature is above 90°F (common in summer), that window shrinks to just 1 hour. After 2 hours, the chicken enters what food safety experts call the ‘danger zone’ (40°F–140°F) and should be discarded — regardless of how it looks or smells.
What percent of Gen Z can’t cook?
Studies and surveys suggest a significant portion of Gen Z lacks basic cooking skills. A 2023 survey by the American Heart Association found that nearly 28% of adults aged 18–24 rarely or never cook at home. Additional data from food industry research suggests up to 50% of Gen Z relies primarily on takeout, delivery, or pre-made meals. This has been linked to reduced exposure to home cooking during childhood and the rise of convenience food culture. Cooking basics like how long to cook chicken properly are genuinely unfamiliar to a large segment of this generation.
Conclusion
Knowing how long to cook chicken is only half the equation. The other half is understanding why — why temperature matters more than time, why resting changes texture, why cold chicken cooks unevenly.
Master these fundamentals and dry, rubbery chicken becomes a thing of the past. Use a thermometer, pound your breasts, let the meat rest — and your chicken will be juicy, safe, and genuinely flavorful every single time.
Sources: USDA Food Safety · Jessica Gavin · Gimme Some Oven · Simply Recipes · Healthline · Sanderson Farms · Chicken.ca · American Heart Association