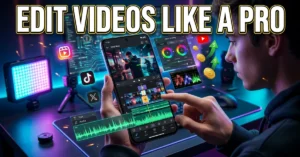
Your phone is a professional video studio. You just need to know how to use it.
According to Statista, over 82% of global internet traffic is now video-based. And more than 54% of content creators use their smartphones as their primary editing device. That number is only growing.
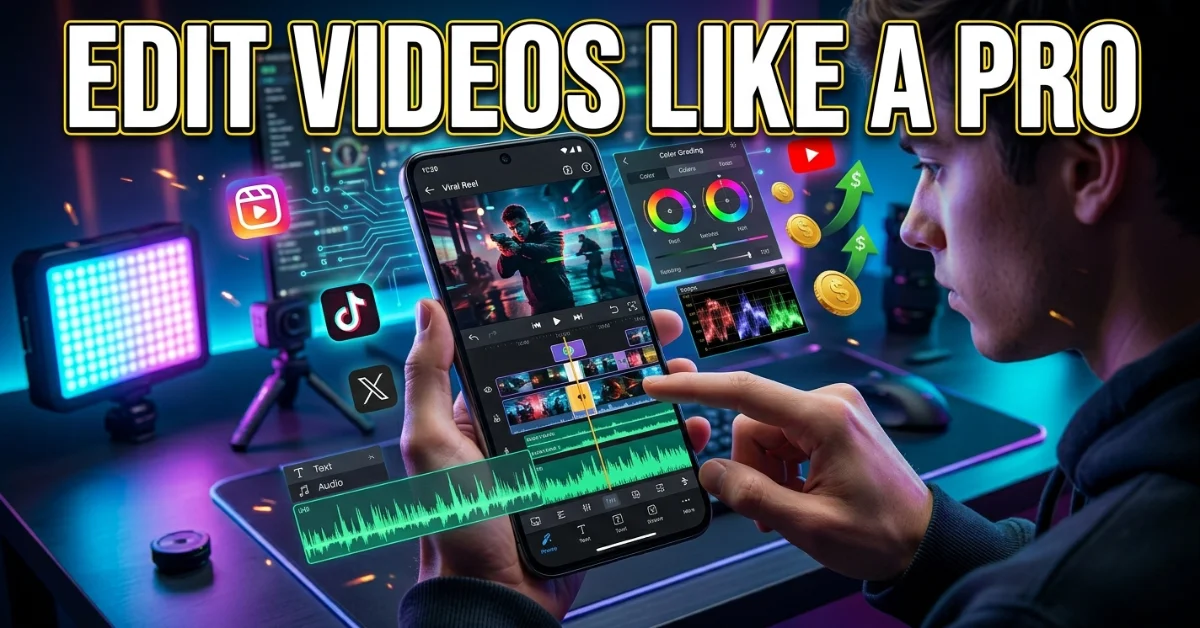
Whether you are making TikTok clips, Instagram Reels, YouTube Shorts, or full vlogs — this guide teaches you exactly how to edit videos on your phone like a pro. Step by step. No desktop required.
What You Need Before You Start Editing Videos on Your Phone
That is why most mobile videos look amateur.
The truth is — your edit is only as good as your footage. Fixing bad video in an app is much harder than filming it right the first time.
Phone Specs That Actually Matter for Mobile Editing
Processor speed is the biggest factor. A slow phone lags during playback, crashes during export, and makes the whole process frustrating. If your phone is more than 4 years old, it may struggle with 4K video editing.
A quality screen matters more than most people realize. An OLED or AMOLED display shows colors, contrasts, and shadows more accurately than an LCD screen. What you see while editing is what your audience sees.
Storage space is the silent killer of mobile editing sessions. A single minute of 4K footage takes approximately 400MB. Always edit with at least 5GB of free storage available.
Film Right Before You Edit
Shoot in 1080p or 4K. Always. This gives you more flexibility when cropping, zooming, or color grading in your editing app.
Clean your lens before every shoot. This sounds obvious. Most creators skip it. A smudged lens creates a soft, hazy look that no filter can fully fix.
Use natural lighting whenever possible. Ring lights and window light produce the cleanest image for mobile cameras. Avoid overhead fluorescent lighting — it creates an unflattering green tint that is hard to color correct on mobile.
Stabilize your shot. Even a small amount of camera shake looks unprofessional. A gimbal or phone grip costs under $30 and eliminates the problem entirely.
Plan Before You Film — The 3-Thumbnail Storyboard Trick
Before filming a single frame, draw three quick thumbnail sketches in a notebook. Shot 1: your opening hook. Shot 2: your main content. Shot 3: your close or call to action.
This mini storyboard takes two minutes and saves hours of editing time. Creators on Skillshare and r/NewTubers consistently rate pre-production planning as the single biggest skill gap for beginner mobile editors.
Aspect Ratio Guide — Film for Your Platform
| Platform | Aspect Ratio | Best Resolution |
| TikTok | 9:16 (Vertical) | 1080 x 1920 |
| Instagram Reels | 9:16 (Vertical) | 1080 x 1920 |
| YouTube Shorts | 9:16 (Vertical) | 1080 x 1920 |
| YouTube (long-form) | 16:9 (Landscape) | 1920 x 1080 or 4K |
| Instagram Feed | 1:1 (Square) | 1080 x 1080 |
| LinkedIn Video | 16:9 or 1:1 | 1920 x 1080 |
For more info: How to Enable Dark Mode on Any App — The Complete Easy Guide (Android & iOS)
Best Apps to Edit Videos on Your Phone (iPhone & Android)
Which app you choose changes everything. The right app for a TikTok creator is completely different from the right app for a documentary filmmaker.
Here is the full breakdown by skill level — including what real creators on Reddit r/NewTubers and r/youtubers actually recommend.
Beginner Apps — Start Here
CapCut is the most downloaded free video editing app in the world, with over 500 million downloads. It is made by the same company as TikTok, which means it integrates perfectly with trending audio, auto-captions, and direct publishing. It is the top recommendation for new creators across every community forum.
InShot is the go-to for creators who want clean, social-media-ready edits fast. Simple timeline, great filters, easy music and text tools. The Reddit consensus: if CapCut feels overwhelming, InShot is the best starting point.
iMovie (iPhone only) comes pre-installed and is completely free. It covers all the basics — trimming, transitions, music, and titles — with zero learning curve. Great for first-time editors.
Google Photos has a built-in video editor that most Android users completely overlook. You can trim, crop, rotate, adjust brightness and contrast, and add filters — all without downloading a single app. Confirmed by Google Photos support.
VN Editor is fully free with no watermarks, which is the reason it consistently tops Reddit threads. Clean interface, multi-track timeline, and smooth exports make it the best completely free option available.
Canva is underrated for video editing. Its AI-powered Highlights tool automatically identifies your best moments. Magic Video sequences and styles clips for you. It publishes directly to Instagram, TikTok, YouTube, and LinkedIn.
Intermediate Apps — Level Up Your Edits
KineMaster gives you a full desktop-grade editing suite on your phone. Keyframes, green screen, blend modes, multi-layer audio, and frame-by-frame trimming are all available. It is the top recommendation on r/youtubers for creators who want YouTube-quality edits on a phone.
Adobe Premiere Rush is the mobile version of industry-standard Premiere Pro. It syncs with Adobe Creative Cloud, includes a stock media library, motion graphics, and multi-track editing. Best for creators already inside the Adobe ecosystem.
PowerDirector by CyberLink is especially strong on Android. It includes AI body effects, motion tracking, and automatic captioning — all in one app. The free version is surprisingly capable without feeling stripped-down.
FilmoraGo by Wondershare offers high-quality templates, an extensive licensed music library, and direct social media sharing. No watermarks on the free version — a genuine differentiator in the intermediate category.
Splice (by GoPro) is purpose-built for action footage and travel content. It handles GoPro clips, drone footage, and sports video better than any other mobile app. If you shoot with an action camera, this is your tool.
Pro-Level Apps — For Serious Mobile Creators
LumaFusion is rated the best professional video editing app for iPhone and iPad by TechRadar, independent reviewers, and the mobile filmmaking community. Six simultaneous video tracks, advanced color grading, slow-motion tools, and frame-by-frame precision — all in a one-time purchase with no subscription.
DaVinci Resolve brings its professional desktop suite to mobile, free. It includes Cut, Edit, Color, Fusion, and Fairlight modules. The color grading tools alone rival professional broadcast software. The learning curve is steep, but the output is cinematic.
Adobe Premiere (mobile, not Rush) launched for iPhone and iPad and is described by TechRadar reviewers as “like having Premiere Pro on your phone.” Most features are entirely free. It is the newest and most powerful free pro option currently available.
Yuzzit is built for professional journalists, community managers, and event creators. Its standout feature is mobile live clipping — capturing a key moment from a live broadcast, editing it on your phone, and publishing it in under 3 minutes. No other mobile app does this.
iPhone vs Android — Which Apps Work Best
| App | iPhone | Android |
| CapCut | Yes – Full Features | Yes – Full Features |
| InShot | Yes | Yes |
| iMovie | Yes (Free) | No |
| Google Photos Editor | Limited | Yes (Full) |
| LumaFusion | Yes (Best on iOS) | Yes (newer) |
| DaVinci Resolve | iPad (best) | Yes |
| KineMaster | Yes | Yes |
| Adobe Premiere Rush | Yes | Yes |
| Final Cut Pro | iPad only | No |
| Yuzzit | Yes | Yes |
How to Edit Videos on Your Phone Step by Step
This is the core workflow used by professional mobile editors. Follow these steps in order for every project.
Step 1 — Import and Sort Your Clips
Open your editing app and create a new project. Import all your raw footage. Then — before you touch the timeline — go through every clip and delete blurry shots, failed takes, and footage you will never use.
This rushed review step is what separates fast editors from slow ones. Starting with clean, curated clips cuts your editing time in half.
Step 2 — Trim, Cut, and Split
How do you cut a part of a video on your iPhone? Open the clip in your timeline. Tap the clip to select it. Drag the yellow handles on the left and right edges inward to trim the start and end. To cut from the middle, position your playhead at the exact frame, then tap Split.
On Android, the process is identical in CapCut, KineMaster, and PowerDirector. The split tool is usually represented by a scissors icon directly above the playhead.
Pro tip: cut on the beat of your music. Edits that sync with audio feel energetic and intentional. Edits that do not sync feel random.
Step 3 — Add Transitions
The biggest mistake beginner editors make: adding transitions between every single clip.
Transitions should have a purpose. A cut (no transition) is clean and professional. A dissolve signals a passage of time. A slide or wipe works for travel and lifestyle content. Jump cuts work for fast-paced talking-head videos.
Use transitions sparingly. One or two per video is usually enough.
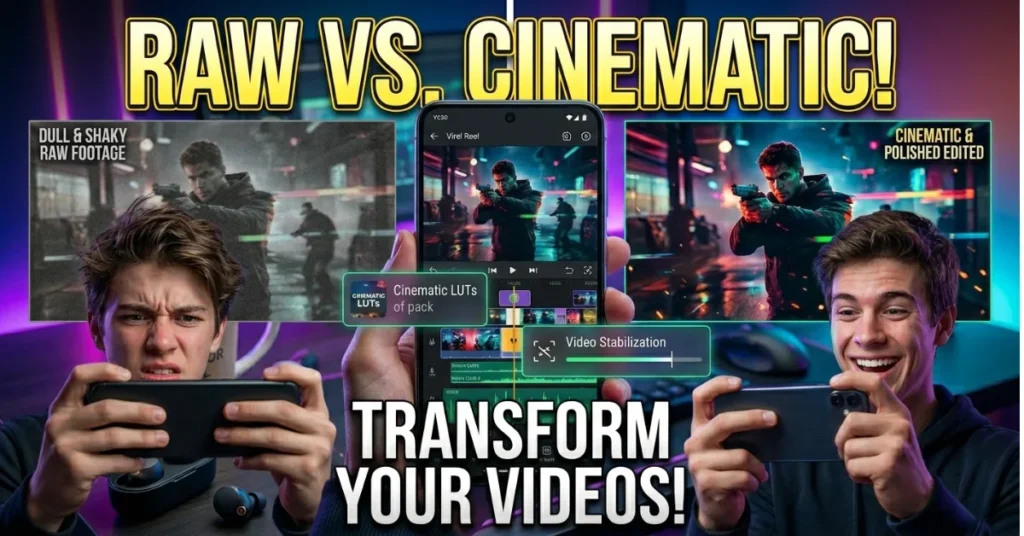
Step 4 — Color Correction and Filters
Color correction fixes problems — exposure, white balance, and shadows. Color grading creates a mood — warm golden tones, cool cinematic teal, clean bright aesthetic.
In CapCut, go to Adjust. Increase brightness by +10 to +15 for indoor footage. Reduce shadows slightly to lift dark areas. Increase sharpness by +10 for a crisper image.
In LumaFusion and DaVinci Resolve, use the Color Wheels for professional-grade grading. Shift the shadows cool (blue) and the highlights warm (orange) for the cinematic look you see in Netflix productions.
Step 5 — Add Music and Audio
Audio quality affects perceived video quality more than visuals do. Studies show viewers will forgive poor video quality before they forgive poor audio.
Use royalty-free music from CapCut’s built-in library, YouTube Audio Library, or Epidemic Sound. Never use copyrighted commercial music on YouTube — your video will be demonetized or taken down.
Use beat sync — available in CapCut and Canva — to automatically snap your cuts to the rhythm of your music track. This single feature makes edits feel dramatically more professional with no extra effort.
Remove background noise using CapCut’s noise reduction tool or Adobe Premiere Rush’s audio cleanup feature. Both work surprisingly well on mobile.
Step 6 — Add Text, Captions, and Subtitles
85% of social media videos are watched without sound, according to multiple platform studies. Captions are not optional — they are essential.
Use CapCut’s auto-caption tool — it transcribes your voiceover in seconds with high accuracy. Style the captions with bold fonts and high-contrast colors for mobile readability.
Yuzzit and Adobe Premiere Rush also offer auto-subtitles. Yuzzit is particularly strong for professional broadcast-style captions with custom branding templates.
Keep text in the safe zone — away from the top and bottom 10% of the frame. Platform UI elements (like TikTok’s caption bar and like buttons) cover these areas on most devices.
Step 7 — Export and Publish
What settings should you export your video in? For most platforms, export as MP4 at 1080p with H.264 encoding. This gives the best balance of quality and file size.
For YouTube, export at 4K if your phone supports it — it helps your video rank higher in YouTube’s quality assessment algorithm.
Export frame rate should match your filming frame rate. 24fps looks cinematic. 30fps looks natural and clean. 60fps is smooth and ideal for sports or action footage.
Pro Editing Techniques Most Phone Editors Never Use
This is the gap. Most mobile editing guides stop at trimming and filters. These are the techniques that separate a good edit from a great one.
Speed Ramping
Speed ramping means smoothly transitioning between slow motion and full speed within a single clip. It creates a dramatic, cinematic effect that stops scrollers mid-swipe.
In CapCut, tap your clip, select Speed, then choose Curve. Use the Hero or Bullet preset to apply a speed ramp instantly. In KineMaster and LumaFusion, you can set custom speed keyframes for full manual control.
Keyframing on Mobile
A keyframe tells the app: “at this exact moment, apply this setting.” Two keyframes create smooth animated movement between two states.
In KineMaster, tap the diamond icon on your timeline to set a keyframe. Change the position, scale, or opacity of a clip between two keyframes to create professional zoom effects, animated overlays, and smooth text movements.
Green Screen on Your Phone
Can you do green screen editing on a phone? Yes. Both CapCut and KineMaster include a chroma key (green screen) tool. You do not need a physical green screen — CapCut’s AI background removal works on any background with decent subject separation.
Film your subject in front of a plain wall. Apply Background Remove in CapCut. Drag in your new background clip. Done. A technique that used to require a desktop suite now takes 60 seconds on a phone.
AI-Powered Editing Tools
AI has fundamentally changed mobile video editing. These are the tools leading that shift in 2025 and 2026:
- CapCut AI beat sync — auto-matches your cuts to music rhythm
- Canva AI Highlights — scans your footage and identifies the best moments automatically
- Canva Magic Video — sequences, styles, and cuts your clips from a text prompt
- Filmora Veo 3 — generates an AI video from a reference image and text prompt, including dialogue and multiple characters
- Videoleap AI tools — scene detection, AI effects, and automated short-form clip generation
- Yuzzit live clipping — captures, edits, and publishes a broadcast moment in under 3 minutes
Multi-Track Audio Editing
Most beginners only use one audio layer — their background music. Professionals use three: music, dialogue/voiceover, and ambient sound effects.
In KineMaster and LumaFusion, you can stack multiple audio tracks independently. Lower the music volume during speech (a technique called ducking). Add subtle room tone or ambient sound to fill the silence between spoken lines. This creates a layered, professional soundscape that budget edits completely lack.
Color Grading vs Color Correction
Color correction = fixing problems. Color grading = creating a visual style. Both matter.
Correction first: fix your white balance, exposure, and contrast so the image looks natural and neutral.
Grading second: apply a creative look. The teal and orange grade (cool shadows, warm skin) is the most popular cinematic style. In DaVinci Resolve mobile, use the Color Wheels to push your shadows toward teal and your highlights toward amber. In LumaFusion, apply a LUT (Look Up Table) for instant professional-grade color.
Platform-Specific Editing Tips for TikTok, Reels, YouTube, and More
Editing the same video for every platform is a mistake. Each platform rewards different editing styles, pacing, and formats.
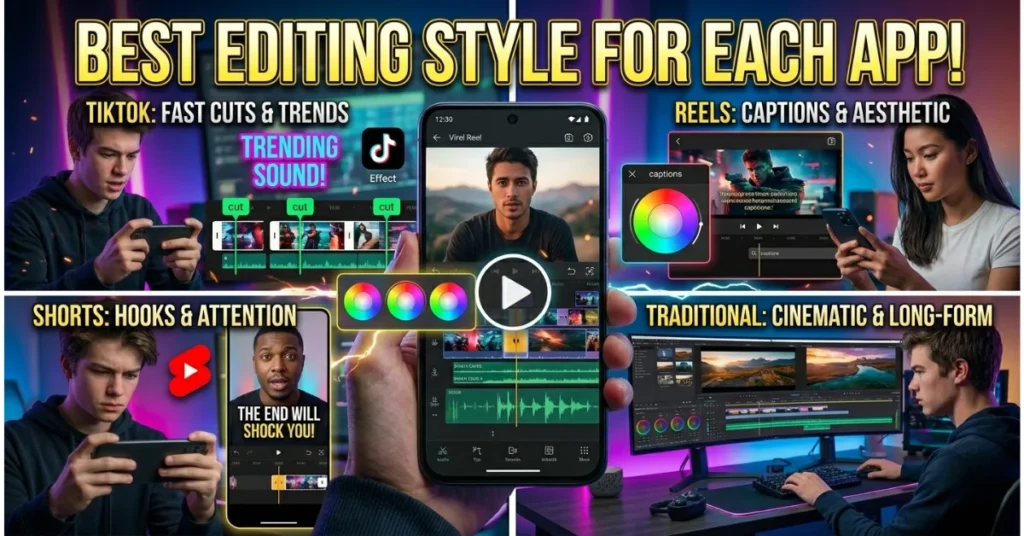
TikTok Editing Tips
TikTok is a vertical, sound-on platform. The first 1 to 2 seconds determine whether your video gets watched or skipped. Lead with your most visually interesting or emotionally compelling frame — never a black screen or slow zoom.
Keep most TikTok edits under 60 seconds unless your analytics show strong audience retention beyond that point. Use beat sync and trending audio — CapCut links directly to TikTok’s trending sounds library, which actively boosts discoverability.
Instagram Reels Tips
Instagram Reels rewards polished aesthetics more than raw authenticity. Consistent color grading, clean transitions, and on-screen text in the safe zone (avoiding the top and bottom 15% where UI overlaps) are all critical.
The first 3-second rule applies here even more strictly than TikTok. Instagram’s algorithm monitors watch time intensely. A slow opener kills your reach before most users even see what your video is about.
YouTube Shorts vs YouTube Long-Form
YouTube Shorts are 60 seconds or less, vertical, and algorithm-boosted. Edit them like TikToks — fast pacing, hook in the first second, clear payoff.
YouTube long-form rewards depth, structure, and chapters. Use chapter markers (timestamps in your description) to help viewers navigate. Export in 4K whenever possible — YouTube’s algorithm rewards upload quality.
LinkedIn Video
LinkedIn video performs best when it looks professional and caption-forward. Most LinkedIn users scroll in silence. Captions are not optional.
Skip trending music. Use no music or subtle background audio. Keep the tone informative and calm. Horizontal or square format both work well. 60 to 90 seconds is the sweet spot for LinkedIn video engagement.
Repurpose One Video Across All Platforms
How do you post on multiple platforms without re-editing every video?
Film in 4K landscape (16:9). This gives you enough resolution to crop a vertical (9:16) version without losing quality. Edit your full video once. Then crop a vertical version for TikTok and Reels. This single workflow strategy saves hours per week.
Use Canva’s Magic Resize (Pro) to automatically reformat your video for every platform in one click. CapCut’s ratio tool does the same thing for free.
FAQ — Your Phone Video Editing Questions Answered
How do I edit a video on my phone?
Download a free editing app — CapCut is the best starting point for most users. Open the app, tap New Project, import your video from your camera roll, trim your clips on the timeline, add music and text, then export as MP4. The full process for a 60-second video takes 10 to 15 minutes once you know the workflow.
How do I cut a part of a video on my iPhone?
Open iMovie or CapCut on your iPhone. Add your video to the timeline. Tap the clip to select it. To trim the beginning or end, drag the yellow handles inward. To remove a section from the middle, position your playhead at the start of the unwanted section and tap Split, then move to the end of the section and split again. Delete the middle segment. Done.
How do I edit a video in the gallery?
On Android, open Google Photos and tap any video. Tap the edit icon (pencil or sliders). You can trim, crop, rotate, adjust brightness and contrast, and add filters — all built in, no download needed. On iPhone, open the Photos app, tap your video, then tap Edit in the top right corner for basic trimming and filter adjustments.
Which app should I use to edit videos on my phone?
It depends on your experience level and goals:
- Beginners: CapCut (best overall), InShot, iMovie (iPhone), Google Photos (Android)
- Intermediate: KineMaster, Adobe Premiere Rush, PowerDirector, FilmoraGo
- Professionals: LumaFusion (best for iPhone), DaVinci Resolve, Adobe Premiere Mobile, Yuzzit
- Free with no watermark: VN Editor, CapCut, DaVinci Resolve
How can I edit my own videos like a pro?
Three habits separate pro mobile editors from beginners: plan before you film (mini storyboard), film in 4K with good lighting, and cut on the beat of your music. Master these three, and your edits will look professional regardless of which app you use.
How can I cut off part of a video on Android or iPhone?
On any phone, open CapCut — it is available for free on both Android and iPhone. Import your video. Place the playhead at the start of the section you want to remove. Tap Split. Move the playhead to the end of that section. Tap Split again. Tap the middle segment to select it, then tap Delete. The unwanted part is gone.
Conclusion
You do not need a studio. You do not need a desktop editor. You do not need expensive equipment. Your phone is already a professional video production tool. You just need the right app and the right workflow.
Start with CapCut or InShot if you are new. Graduate to KineMaster or Adobe Premiere Rush as your skills grow. And when you are ready for the highest level, LumaFusion and DaVinci Resolve deliver results that rival desktop software — from a device that fits in your pocket.
Film it. Edit it. Post it. That is how every great creator started.